How Microblading Is Done
Microblading has become a game-changer in the beauty industry, offering a semi-permanent solution for achieving beautifully defined eyebrows. This technique, known for its natural-looking results, involves a meticulous process that requires skill and precision. Whether you’re a practitioner perfecting your craft or a client curious about what to expect, understanding how microblading is done can enhance your appreciation for this transformative procedure. In this blog post, we’ll take you through the detailed steps involved in microblading, from the initial consultation to the final touch-up.
Initial Consultation: Setting the Foundation
The journey of microblading begins with a thorough consultation between the client and the practitioner. This step is crucial for understanding the client's expectations, assessing their suitability for the procedure, and planning the design of the eyebrows.
Client Assessment
During the consultation, the practitioner will evaluate the client’s skin type, existing eyebrow shape, and facial features. It’s essential to identify any contraindications, such as skin conditions or allergies, that might affect the procedure or the healing process.
Design and Mapping
One of the most critical aspects of the consultation is the design and mapping of the eyebrows. The practitioner will use various tools to measure and outline the ideal brow shape, considering the client’s natural brow line, face shape, and desired look. This step ensures symmetry and proportion, laying the groundwork for precise microblading.
Colour Selection
Choosing the right pigment colour is vital for achieving natural-looking results. The practitioner will select a pigment that matches or complements the client’s hair colour and skin tone. This customised approach ensures that the final outcome blends seamlessly with the client’s overall appearance.
Preparing for the Procedure: Hygiene and Comfort
Ensuring a hygienic environment and client comfort are paramount before beginning the microblading process.
Sterilisation and Setup
The practitioner will prepare a sterile workspace, including sanitising tools and the treatment area. Disposable, single-use microblading tools are used to prevent cross-contamination and ensure the highest level of hygiene.
Numbing
To minimise discomfort during the procedure, a topical anaesthetic is applied to the client’s eyebrows. This numbing cream needs some time to take effect, typically around 20-30 minutes. Once the area is sufficiently numb, the practitioner can begin the microblading process.
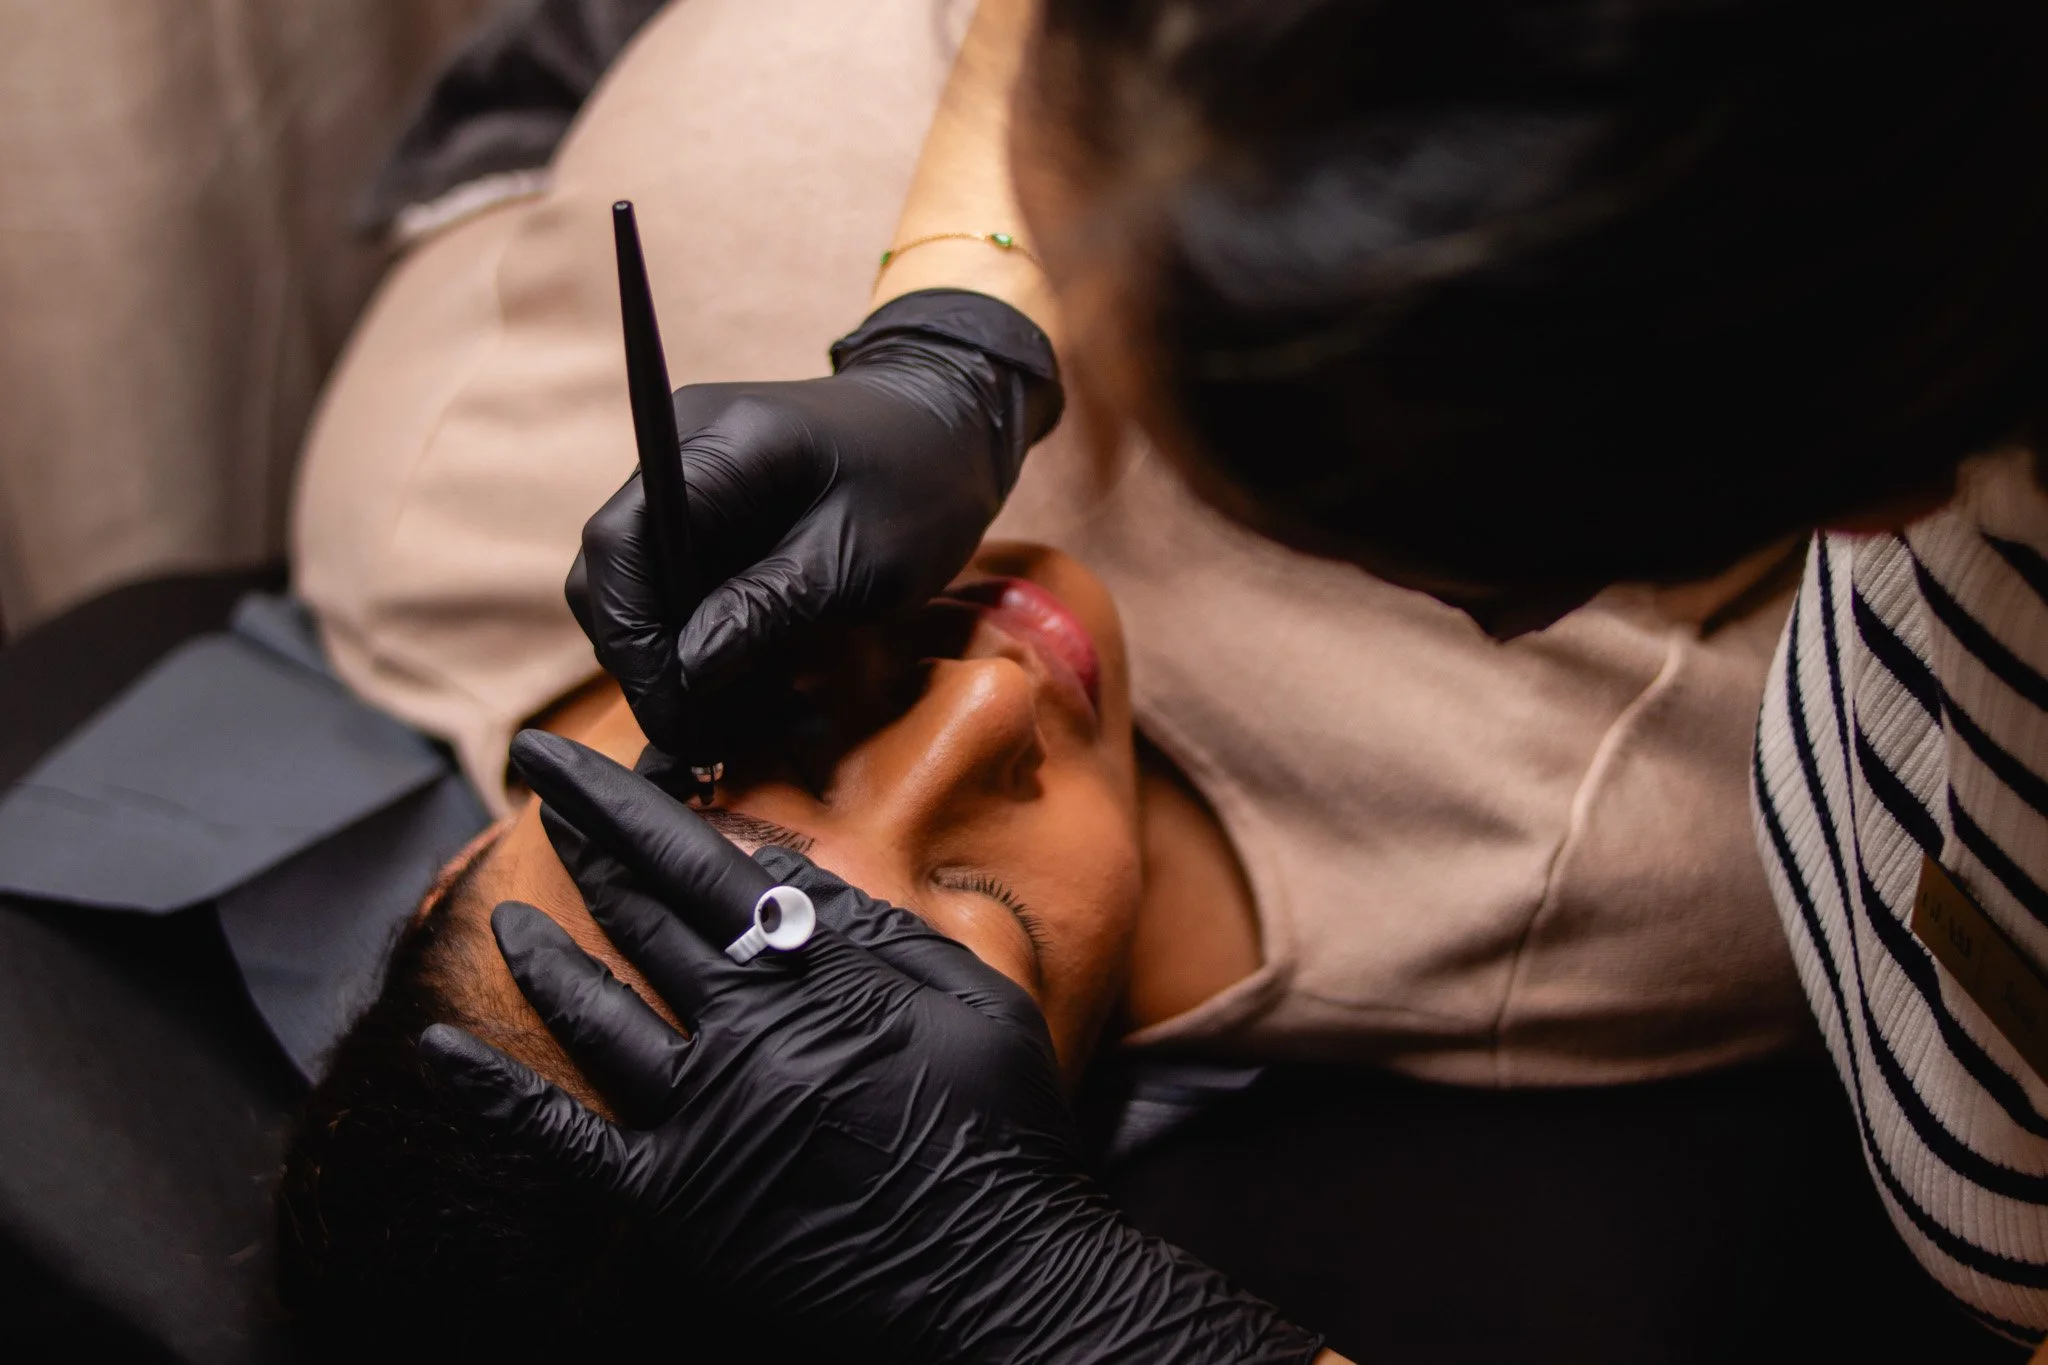
The Microblading Process: Artistry in Action
Microblading involves creating hair-like strokes to enhance the appearance of the eyebrows. This step-by-step process requires a steady hand and an eye for detail.
Drawing the Strokes
Using a manual tool with fine, sterile needles, the practitioner makes small, precise cuts in the epidermal layer of the skin. These cuts mimic the natural direction and thickness of eyebrow hairs, creating a realistic effect. The pigment is then deposited into these tiny incisions.
Layering and Building
To achieve the desired fullness and shape, the practitioner may need to go over certain areas multiple times, layering the strokes to build up the eyebrows gradually. This careful layering ensures that the brows look natural and cohesive rather than overly dense or artificial.
Checking and Adjusting
Throughout the procedure, the practitioner will periodically check the symmetry and overall appearance of the eyebrows. Adjustments are made as needed to ensure that both brows match and align with the pre-drawn design.
Post-Procedure: Immediate Aftercare
After the microblading process is complete, immediate aftercare is crucial for optimal healing and pigment retention.
Cleaning and Protection
The practitioner will clean the treated area to remove any excess pigment and apply a protective ointment. This ointment helps to soothe the skin and promotes healing.
Aftercare Instructions
Clients are provided with detailed aftercare instructions to follow during the healing period. These typically include:
Avoiding Water and Sweat: Keeping the eyebrows dry for the first week is essential. Clients should avoid activities that cause excessive sweating or exposure to water.
No Picking or Scratching: As the brows heal, scabbing may occur. Clients must refrain from picking or scratching the scabs to prevent pigment loss and infection.
Using Ointments: Applying a recommended ointment can keep the area moisturised and support the healing process.
The Healing Process: Patience and Care
Healing from microblading takes time, and understanding the stages can help manage expectations.
Initial Healing (Days 1-7)
During the first week, the eyebrows may appear darker and more intense than expected. This is normal and will gradually lighten as the skin heals and the pigment settles.
Peeling and Scabbing (Days 7-14)
Around the second week, the treated area may start to peel and scab. This stage can be somewhat uncomfortable, but it’s crucial not to disturb the scabs to ensure proper pigment retention.
Settling (Weeks 3-4)
By the third and fourth weeks, most of the peeling should have subsided, and the brows will start to reveal their true colour and shape. The final result will continue to develop over the next few weeks.
Touch-Up Session: Perfecting the Brows
A touch-up session is typically scheduled 4-6 weeks after the initial procedure. This follow-up appointment allows the practitioner to assess the healed results and make any necessary adjustments.
Evaluating the Healing
The practitioner will evaluate how well the pigment has settled and whether any areas require additional strokes or pigment. Some clients may experience minor fading or unevenness that needs correction.
Additional Strokes and Pigment
During the touch-up, the practitioner can add more strokes or layers of pigment to enhance the brows further. This session ensures that the final result is perfect and long-lasting.
Long-Term Maintenance: Keeping Your Brows Beautiful
Microblading is semi-permanent, meaning that it will gradually fade over time. Long-term maintenance is essential to keep your brows looking their best.
Regular Touch-Ups
To maintain the desired look, clients should schedule touch-up appointments every 12-18 months. Regular touch-ups help to refresh the pigment and keep the brows defined.
Avoiding Excessive Sun Exposure
Sun exposure can cause the pigment to fade more quickly. Using sunscreen on the brows or wearing a hat can help protect the colour and extend the longevity of the microblading.
Skincare Products
Clients should be mindful of skincare products that contain retinol or acids, as these can accelerate fading. It’s best to avoid applying such products directly to the brow area.
Microblading is both an art and a science, requiring a blend of technical skill, artistic vision, and meticulous care. From the initial consultation to the final touch-up, each step in the microblading process is designed to create beautiful, natural-looking eyebrows tailored to the individual client.
For practitioners, mastering the technique involves continuous learning and practice, staying updated with the latest advancements and trends in the industry. For clients, understanding the process and following proper aftercare can ensure the best possible results.
By appreciating the detailed steps involved in microblading, both practitioners and clients can better navigate this transformative journey, achieving stunning, long-lasting eyebrows that enhance natural beauty. Whether you’re new to microblading or looking to deepen your knowledge, this guide provides a comprehensive overview of how microblading is done, celebrating the artistry and precision behind this popular beauty treatment.